Carl liu 是台灣人喔.中文名子是劉傳凱!而且是motorola的設計中心經理
轉貼Carl的麥克筆手繪步驟.希望對大家有所幫助!!
第一步
apply light pencil stroke to give basic design and position on the page.
(用鉛筆 輕輕的在紙上畫出大概的圖案和位置) 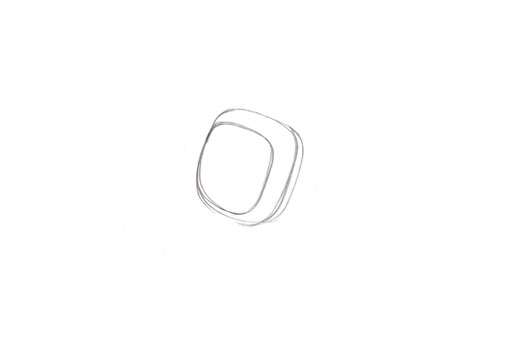
第二步
refining the shape of the object.
(修飾物體的圖形) 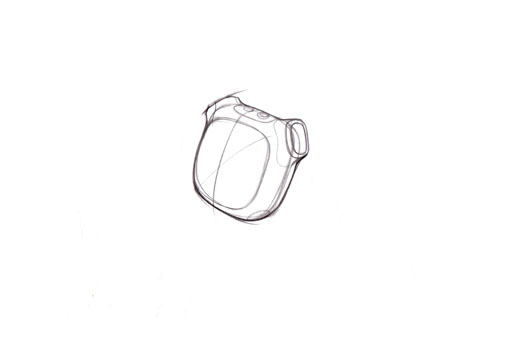
第三步
apply heavier pencil stroke when design is confirmed. Then repeat the step 1 for other views.
(當設計確定時 加上粗的鉛筆線條 然後重複同樣的步驟 在其它角度的草圖上)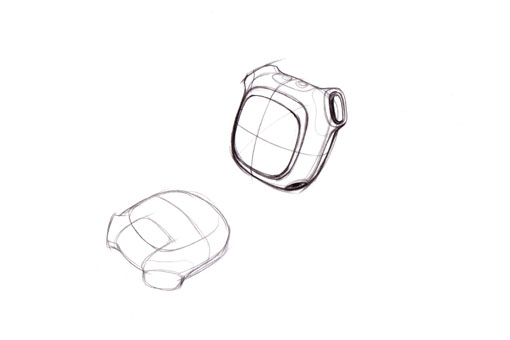
第四步
lay in more design content..
(加多一點東西...) 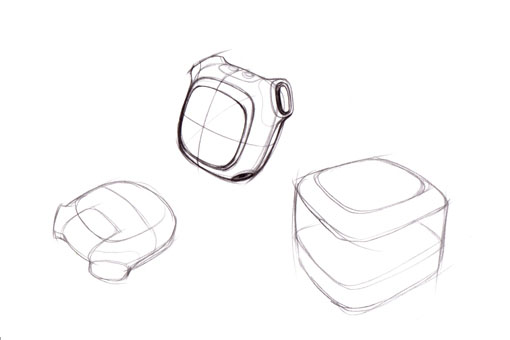
第五步
a little guy for showing how to use the object.
(畫一個人 解釋如何去使用這個產品) 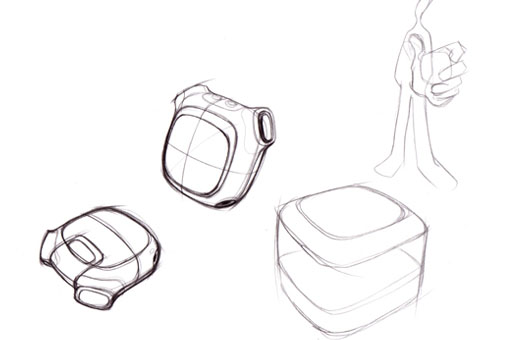
第六步
give shadows to make the drawn object jump out the page.
(加上陰影 讓圖更跳) 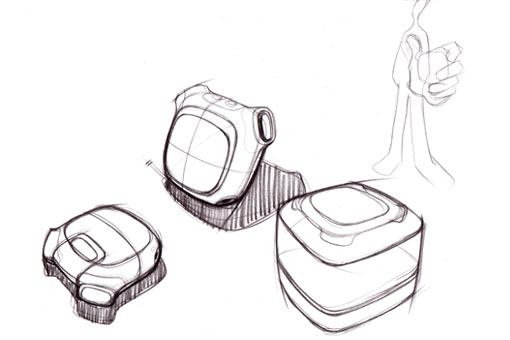
第七步
apply heavy line weight to trace the light sketch.
(再加上重線條在之前的草圖上)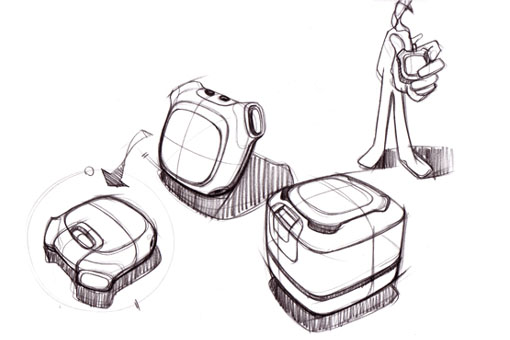
第八步
more details..
(加細節...) 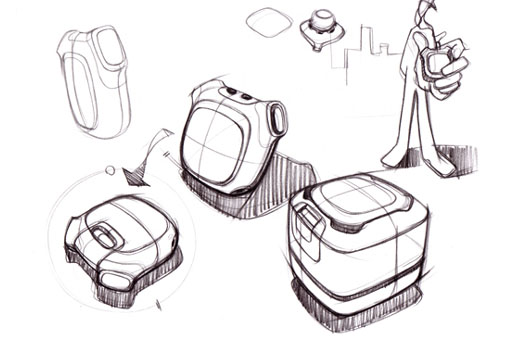
第九步
more details..
(加細節...) 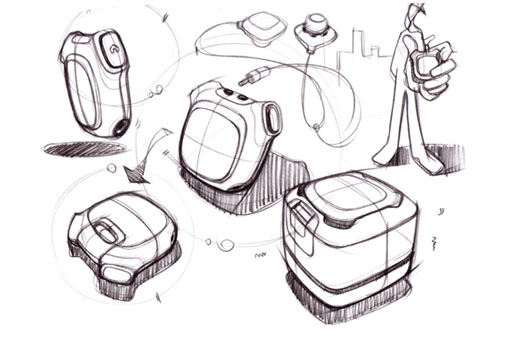
第十步
marker color in on the back of the tracing paper.
(把麥克筆上在描圖紙的背面) 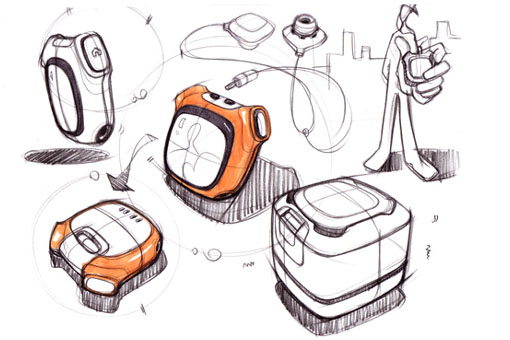
第十一步
Keep fill in color form the back of the tracing paper.
(繼續在描圖紙的背面上 塗上其它的顏色) 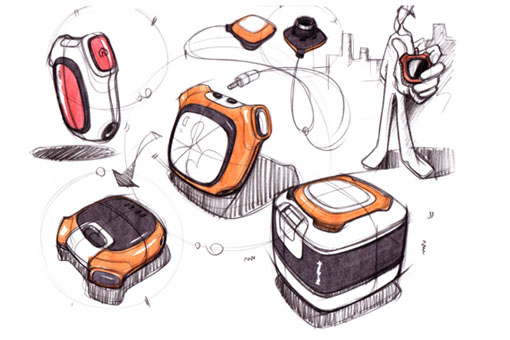
第十二步
Black and white prismacolor pencils give dark cores and high light on objects.
(用黑色和白色的色鉛筆 在物體上畫出光影和陰影) 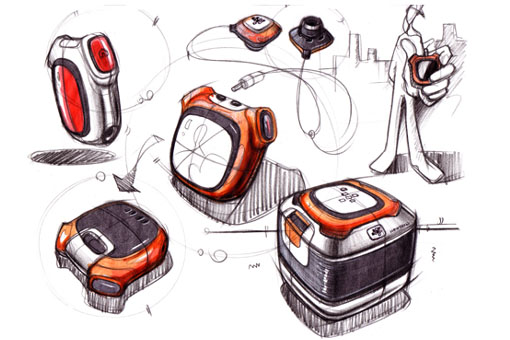
第十三步
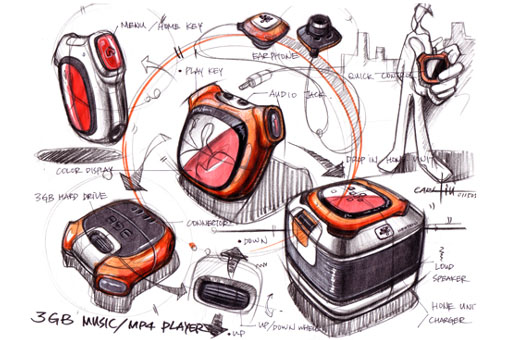
add call-out to explain the design intension.. Sign and then finish.
(加上註解 解釋設計的意圖 簽名 然後就完成)
追加(after scenes):
如何上麥克筆在描圖紙上
P1_ marker color in on the back of the tracing paper.
(在描圖紙的背面上麥克筆) 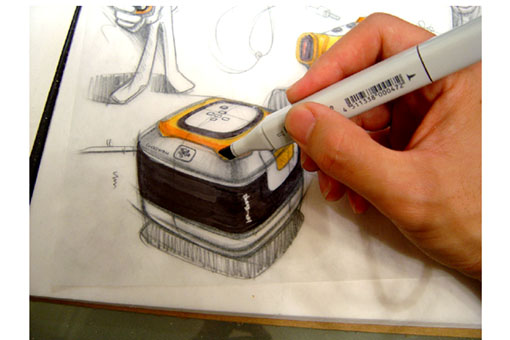
P2_ keep using makers on the back.
(繼續上麥克筆在描圖紙的背面)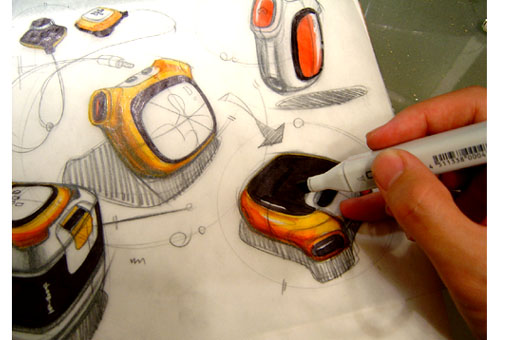
P3_ put a mesh underneath the page for speaker texture.
(把網眼墊在描圖紙的背後 用來畫出喇叭布的質感) 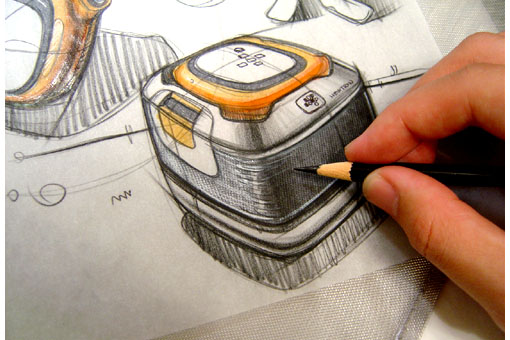
P4_ hold pencil side ways to apply dark cores.
(斜斜的抓筆 來畫出陰影) 
P5_ add shadows on objects.
(加上影子在物體上) 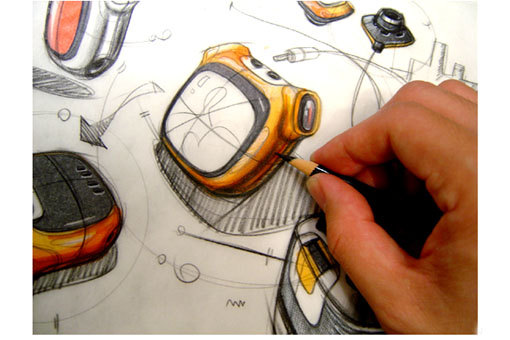
P6_ white pencil to give high light and part lines.
(用白色的色鉛筆 加上光影和分模線) 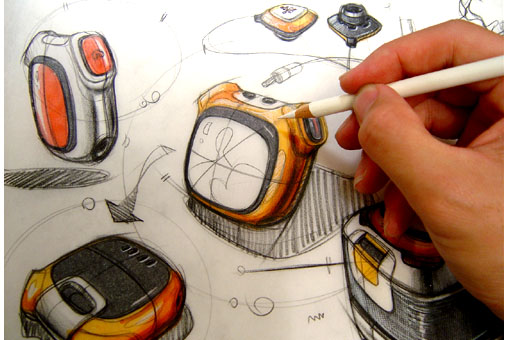
P7_ Material and tools. always remember to keep the pencil sharp.
(材料和工具
永遠記得削尖鉛筆)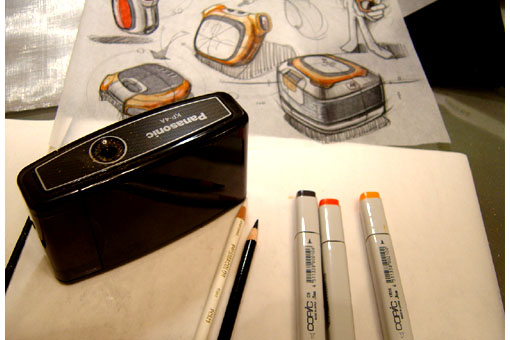
- Oct 19 Fri 2007 22:08
[教學]Carl liu的sketch tutorial
全站熱搜


 留言列表
留言列表
 留言列表
留言列表發表留言
